How to edit and delete channels on LG smart TV
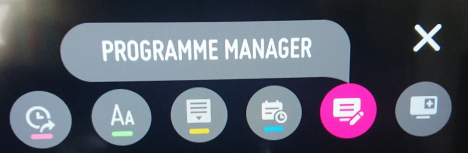
This post describes how to edit and delete channels from the TV guide for an LG smart TV. Resolution On my LG TV (webOS UK6950PLB), the steps I took to do this were: Open the LG TV guide Press the Programme Manager icon in the top right: Press Edit All Programmes On the Edit All Programmes screen, select the channels to hide on the right Press the Skip/Restore icon in the top right Select Skip from the drop down: Once a channel has been set to Skip, it no longer appears in the TV guide. Can't see Programme Manager? If your LG TV has a Channel Manager with an Edit All Channels screen, you may be able to access a Delete/Restore function. This can be seen in the Set Up Over-the-Air Channels section of this article: https://www.tomsguide.com/uk/us/lg-tv-settings-guide,review-4701.html Related Posts - LG TV This app will now restart to free up more memory - LG TV Clear All Browsing History Data - LG TV turn off Quick Start in settings - LG TV move or delet...